---
title: Setup
---
# PowerBI Ingestion Guide: Setup & Prerequisites
In order to configure ingestion from PowerBI, you'll first have to ensure you have an Azure AD app with permission to access the PowerBI resources.
## PowerBI Prerequisites
1. **Create an Azure AD app:** Follow below steps to create an Azure AD app
a. Login to https://portal.azure.com
b. Go to `Azure Active Directory`
c. Navigate to `App registrations`
d. Click on `+ New registration`
e. On `Register an application` window fill the `Name` of application says `powerbi-app-connector` and keep other default as is
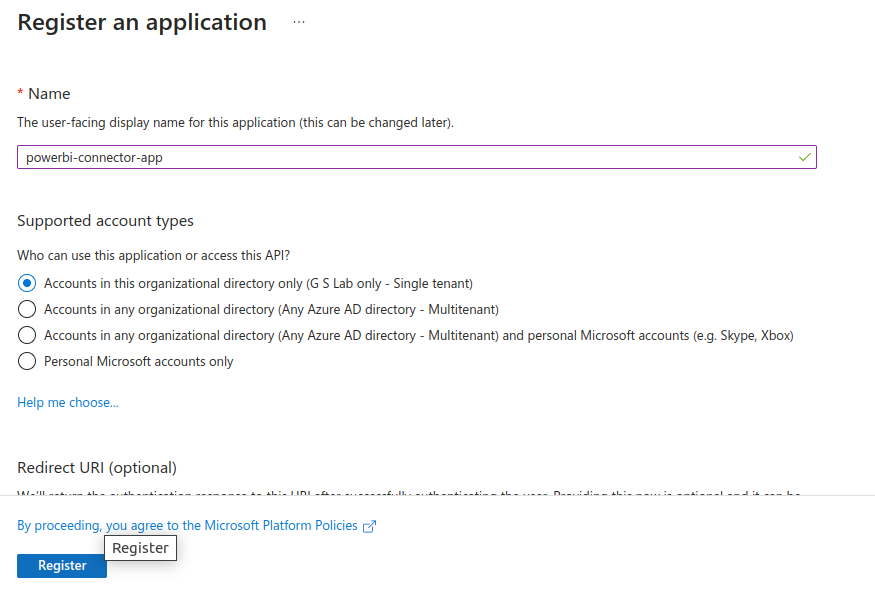
f. On `Register an application` window click on `Register`
g. The Azure portal will open up the `powerbi-app-connector` window as shown below. On this screen note down the `Application (client) ID` and click on `Add a certificate or secret` to generate a secret for the `Application (client) ID`
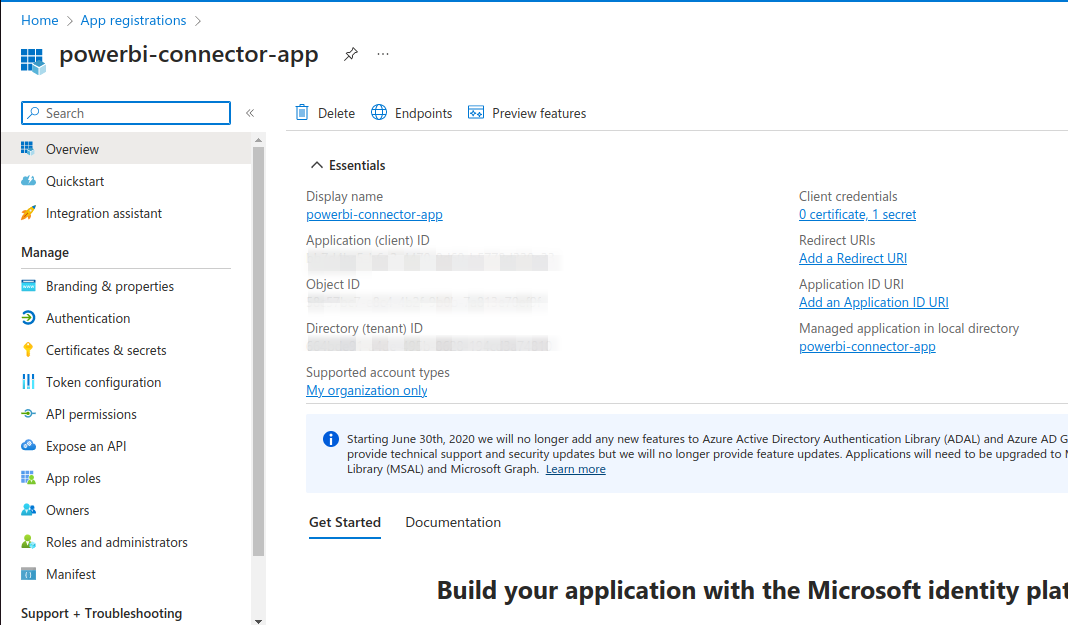
f. On `powerbi-connector-app | Certificates & secrets` window generate the client secret and note down the `Secret`
2. **Create an Azure AD Security Group:** You need to add the `Azure AD app` into the security group to control resource permissions for the `Azure AD app`. Follow below steps to create an Azure AD Security Group.
a. Go to `Azure Active Directory`
b. Navigate to `Groups` and click on `New group`
c. On `New group` window fill out the `Group type`, `Group name`, `Group description`. `Group type` should be set to `Security` . `New group` window is shown in below screenshot.
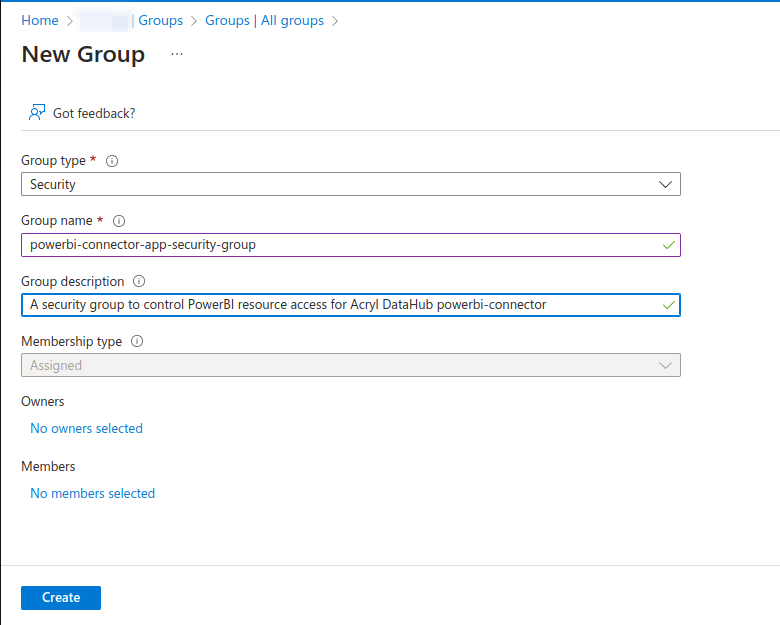
d. On `New group` window click on `No members selected` and add `Azure AD app` i.e. _powerbi-connector-app_ as member
f. On `New group` window click on `Create` to create the security group `powerbi-connector-app-security-group`.
3. **Assign privileges to powerbi-connector-app-security-group:** You need to add the created security group into PowerBI portal to grant resource access. Follow below steps to assign privileges to your security group.
a. Login to https://app.powerbi.com/
b. Go to `Settings` -> `Admin Portal`
c. On `Admin Portal` navigate to `Tenant settings` as shown in below screenshot.
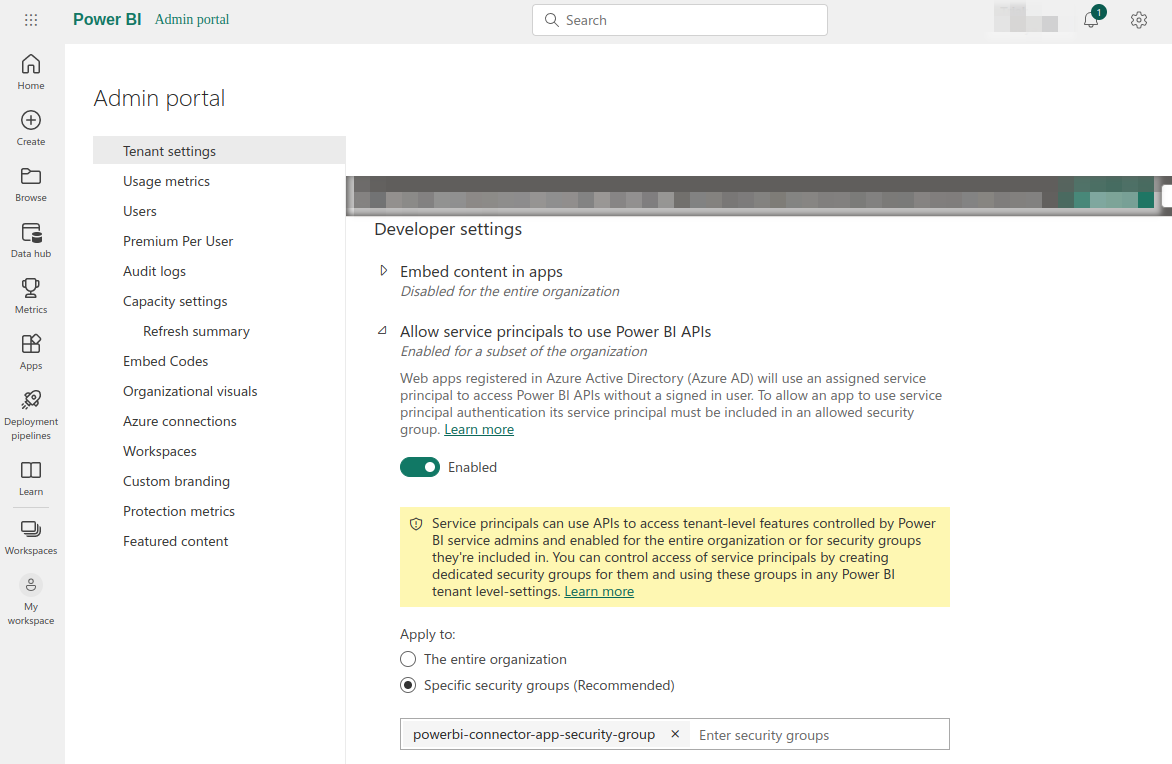
d. **Enable PowerBI API:** Under `Tenant settings` -> `Developer settings` -> `Allow service principals to use Power BI APIs` add the previously created security group i.e. _powerbi-connector-app-security-group_ into `Specific security groups (Recommended)`
e. **Enable Admin API Settings:** Under `Tenant settings` -> `Admin API settings` enable the following options
- `Allow service principals to use read-only admin APIs`
- `Enhance admin APIs responses with detailed metadata`
- `Enhance admin APIs responses with DAX and mashup expressions`
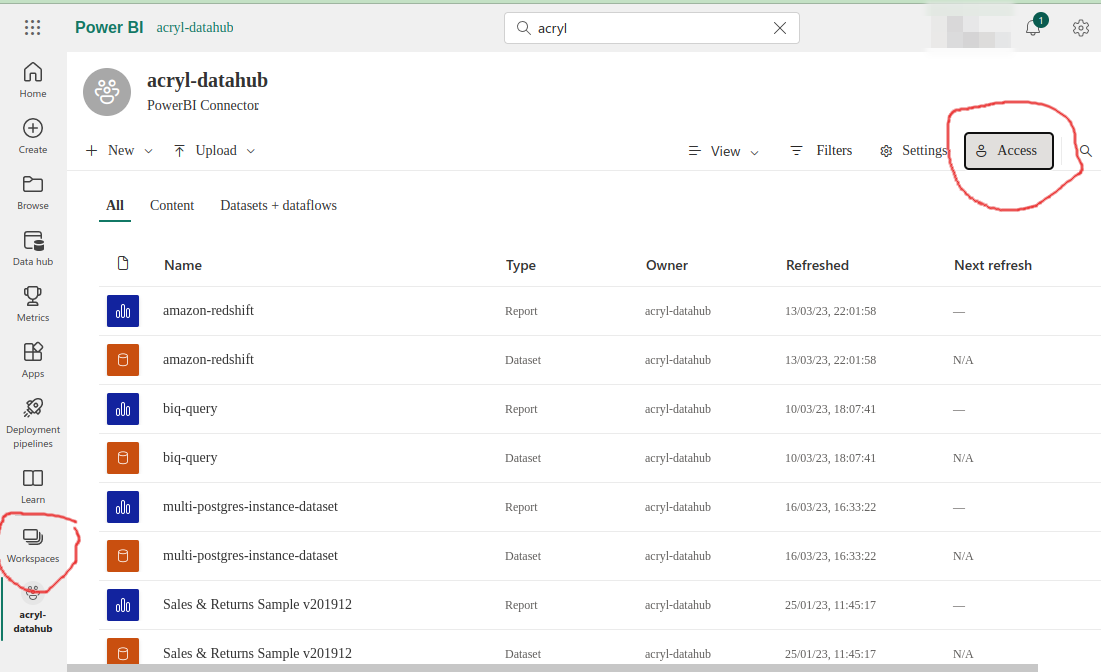
f. **Add Security Group to Workspace:** Navigate to `Workspaces` window and open workspace which you want to ingest as shown in below screenshot and click on `Access` and add `powerbi-connector-app-security-group` as member. For most cases `Viewer` role is enough, but for profiling the `Contributor` role is required.
## Next Steps
Once you've done all of the above steps, it's time to [move on](configuration.md) to configuring the actual ingestion source within DataHub.