13 KiB
| id | title |
|---|---|
| intro | Getting started |
Playwright can either be used as a part of the Playwright Test test runner (this guide), or as a Playwright Library.
Playwright Test was created specifically to accommodate the needs of the end-to-end testing. It does everything you would expect from the regular test runner, and more. Playwright test allows to:
- Run tests across all browsers.
- Execute tests in parallel.
- Enjoy context isolation out of the box.
- Capture videos, screenshots and other artifacts on failure.
- Integrate your POMs as extensible fixtures.
Installation
Playwright has its own test runner for end-to-end tests, we call it Playwright Test.
Using the VS Code extension
Install the VS Code extension from the marketplace.
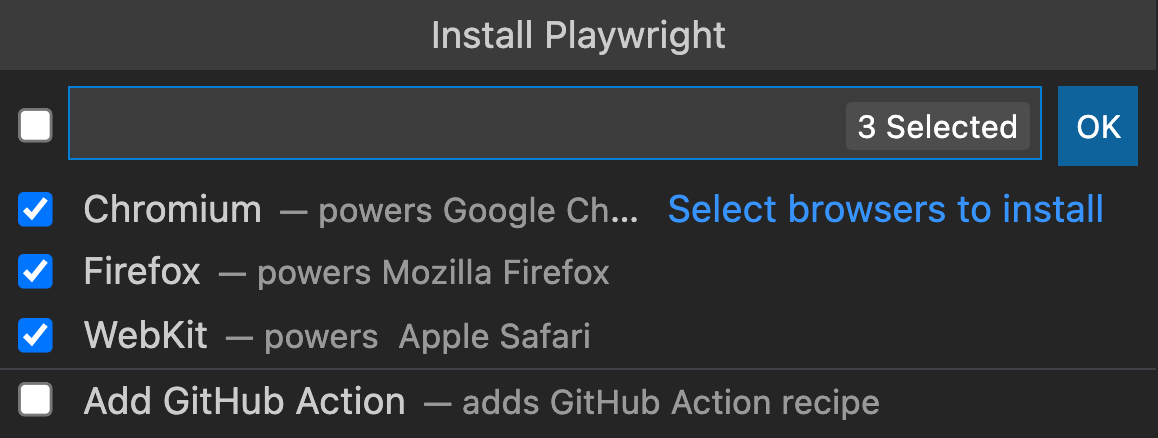
If you don't have the Playwright Test npm package installed in your project, or if you are starting with a new testing project, "Install Playwright" action will help you get started.

Pick the browsers you'd like to use by default, don't worry, you'll be able to change them later to add or configure the browsers used.
The extension automatically detects if you have [Playwright Test] installed and loads the [Playwright Test] projects into Visual Studio Code. By default it will select the first project as a run profile and inside the test explorer you can change this behavior to run a single test in multiple or different browsers.
Using init command
Alternatively, you can scaffold your project using the init command.
# Run from your project's root directory
npm init playwright@latest
# Or create a new project
npm init playwright@latest new-project
This will create a configuration file, optionally add examples, a GitHub Action workflow and a first test example.spec.ts. You can now jump directly to writing assertions section.
Manually
Add dependency and install browsers.
npm i -D @playwright/test
# install supported browsers
npx playwright install
You can optionally install only selected browsers, see install browsers for more details. Or you can install no browsers at all and use existing browser channels.
First test
Create tests/example.spec.js (or tests/example.spec.ts for TypeScript) to define your test.
const { test, expect } = require('@playwright/test');

test('basic test', async ({ page }) => {
  await page.goto('https://playwright.dev/');
  const title = page.locator('.navbar__inner .navbar__title');
  await expect(title).toHaveText('Playwright');
});
import { test, expect } from '@playwright/test';

test('basic test', async ({ page }) => {
  await page.goto('https://playwright.dev/');
  const title = page.locator('.navbar__inner .navbar__title');
  await expect(title).toHaveText('Playwright');
});
Now run your tests, assuming that test files are in the tests directory.
npx playwright test
Playwright Test just ran a test using Chromium browser, in a headless manner. Let's tell it to use headed browser:
npx playwright test --headed
Configuration file
To enjoy all the features that Playwright Test has to offer, you would want to create a configuration file playwright.config.ts (or playwright.config.js). It allows you to run tests in multiple browsers configured as you'd like.
Here is an example configuration that runs every test in Chromium, Firefox and WebKit, by creating a "project" for each browser configuration. It also specifies two retries and tracing options.
// playwright.config.js
// @ts-check
const { devices } = require('@playwright/test');

/** @type {import('@playwright/test').PlaywrightTestConfig} */
const config = {
  forbidOnly: !!process.env.CI,
  retries: process.env.CI ? 2 : 0,
  use: {
    trace: 'on-first-retry',
  },
  projects: [
    {
      name: 'chromium',
      use: { ...devices['Desktop Chrome'] },
    },
    {
      name: 'firefox',
      use: { ...devices['Desktop Firefox'] },
    },
    {
      name: 'webkit',
      use: { ...devices['Desktop Safari'] },
    },
  ],
};

module.exports = config;
// playwright.config.ts
import { type PlaywrightTestConfig, devices } from '@playwright/test';

const config: PlaywrightTestConfig = {
  forbidOnly: !!process.env.CI,
  retries: process.env.CI ? 2 : 0,
  use: {
    trace: 'on-first-retry',
  },
  projects: [
    {
      name: 'chromium',
      use: { ...devices['Desktop Chrome'] },
    },
    {
      name: 'firefox',
      use: { ...devices['Desktop Firefox'] },
    },
    {
      name: 'webkit',
      use: { ...devices['Desktop Safari'] },
    },
  ],
};
export default config;
Look for more options in the configuration section.
Now you can run tests in multiple browsers by default.
npx playwright test

Running 5 tests using 5 workers

  ✓ [chromium] › example.spec.ts:3:1 › basic test (2s)
  ✓ [firefox] › example.spec.ts:3:1 › basic test (2s)
  ✓ [webkit] › example.spec.ts:3:1 › basic test (2s)
Use --project command line option to run a single project.
npx playwright test --project=firefox

Running 1 test using 1 worker

  ✓ [firefox] › example.spec.ts:3:1 › basic test (2s)
Writing assertions
Playwright Test uses expect library for test assertions. It extends it with the Playwright-specific matchers to achieve greater testing ergonomics.
Learn more about test assertions here.
Here is a quick example of using them:
// example.spec.js
const { test, expect } = require('@playwright/test');

test('my test', async ({ page }) => {
  await page.goto('https://playwright.dev/');

  // Expect a title "to contain" a substring.
  await expect(page).toHaveTitle(/Playwright/);

  // Expect an attribute "to be strictly equal" to the value.
  await expect(page.locator('text=Get Started')).toHaveAttribute('href', '/docs/intro');

  await page.locator('text=Get Started').click();
  // Expect some text to be visible on the page.
  await expect(page.locator('text=Introduction').first()).toBeVisible();
});
// example.spec.ts
import { test, expect } from '@playwright/test';

test('my test', async ({ page }) => {
  await page.goto('https://playwright.dev/');

  // Expect a title "to contain" a substring.
  await expect(page).toHaveTitle(/Playwright/);

  // Expect an attribute "to be strictly equal" to the value.
  await expect(page.locator('text=Get Started')).toHaveAttribute('href', '/docs/intro');

  await page.locator('text=Get Started').click();
  // Expect some text to be visible on the page.
  await expect(page.locator('text=Introduction').first()).toBeVisible();
});
Using test fixtures
You noticed an argument { page } that the test above has access to:
test('basic test', async ({ page }) => {
  ...
test('basic test', async ({ page }) => {
  ...
We call these arguments fixtures. Fixtures are objects that are created for each test run. Playwright Test comes loaded with those fixtures, and you can add your own fixtures as well. When running tests, Playwright Test looks at each test declaration, analyses the set of fixtures the test needs and prepares those fixtures specifically for the test.
Here is a list of the pre-defined fixtures that you are likely to use most of the time:
| Fixture | Type | Description |
|---|---|---|
| page | [Page] | Isolated page for this test run. |
| context | [BrowserContext] | Isolated context for this test run. The page fixture belongs to this context as well. Learn how to configure context. |
| browser | [Browser] | Browsers are shared across tests to optimize resources. Learn how to configure browser. |
| browserName | [string] | The name of the browser currently running the test. Either chromium, firefox or webkit. |
Using test hooks
You can use test.beforeAll and test.afterAll hooks to set up and tear down resources shared between tests.
And you can use test.beforeEach and test.afterEach hooks to set up and tear down resources for each test individually.
// example.spec.js
const { test, expect } = require('@playwright/test');

test.describe('feature foo', () => {
  test.beforeEach(async ({ page }) => {
    // Go to the starting url before each test.
    await page.goto('https://playwright.dev/');
  });

  test('my test', async ({ page }) => {
    // Assertions use the expect API.
    await expect(page).toHaveURL('https://playwright.dev/');
  });
});
// example.spec.ts
import { test, expect } from '@playwright/test';

test.describe('feature foo', () => {
  test.beforeEach(async ({ page }) => {
    // Go to the starting url before each test.
    await page.goto('https://playwright.dev/');
  });

  test('my test', async ({ page }) => {
    // Assertions use the expect API.
    await expect(page).toHaveURL('https://playwright.dev/');
  });
});
VS Code extension
Install the VS Code extension from the marketplace.
Run tests with a single click
You can use Tests sidebar to run a test or a group of tests with a single click.

Follow the execution line
While tests are running, execution line is highlighted, once the line has completed, step time is rendered as an editor decoration.

Debug step-by-step, explore selectors
Right click and start breakpoint debugging. Set a breakpoint, hover over a value. When your cursor is on some Playwright action or a locator, corresponding element (or elements) are highlighted in the browser.

Record new tests
Record new tests via performing the test actions in the browser.

Tune selectors
You can edit test source code to fine-tune selectors while on a breakpoint. A selector playground on every line of your test script!

Command line
Following are the usual command line patterns. Learn more about the command line.
-
Run all the tests
npx playwright test -
Run a single test file
npx playwright test tests/todo-page.spec.ts -
Run a set of test files
npx playwright test tests/todo-page/ tests/landing-page/ -
Run files that have
my-specormy-spec-2in the file namenpx playwright test my-spec my-spec-2 -
Run the test with the title
npx playwright test -g "add a todo item" -
Run tests in headed browsers
npx playwright test --headed -
Run tests in a particular configuration (project)
npx playwright test --project=firefox -
Disable parallelization
npx playwright test --workers=1 -
Choose a reporter
npx playwright test --reporter=dot -
Run in debug mode with Playwright Inspector
npx playwright test --debug -
Ask for help
npx playwright test --help
Configure NPM scripts
Playwright Test will automatically pick up playwright.config.js or playwright.config.ts.
{
  "scripts": {
    "test": "playwright test"
  }
}
If you put your configuration file in a different place, pass it with --config option.
{
  "scripts": {
    "test": "playwright test --config=tests/example.config.js"
  }
}
:::note
To pass options through npm script, use double dashes: npm run test -- --headed.
:::